Showing posts with label beading. Show all posts

Saturday, October 9, 2010

Polymer Clay: Inked beads, tile hearts

These are translucent beads with two colors of adirondac inks.  They were put in the tumbler and then buffed.  I made these a year or so ago and they looked boring and I did not do anything with them.  But I Finally figured out how to tumble and buff and they look great now.

Patty

Above are curvey beads from a mistake.  I tried making a cane that looks like glass tiles and grout.  but I made it too small and the effect did not work.  I eventually made a large cane and I used it to make hearts.
These are beads using the bad cane from the previous picture.

It just goes to show that even mistakes can be used for other stuff when working in this medium.

Here is the good cane used to make hearts.  The one on the left did not come out good but the one on the right came out good.
The one on the left had the cane put on the round ball before the heart was formed so it stretched significantly.  The one on the right had the cane slices put on the cone shape that leads to the heart shape. No stretching here.

Patty


Polymer Clay: Mayan croc cane

This is an attempt at caning and reducing.  This is a mayan style croc inspired by some pictures I found by googling images of mayan art.  It is not perfect but I still love it and did a good job reducing.  I think I finally have the hang of caning.  I had at some point last year given up on caning images as impossible.  I managed to reduce a cane recently and I got back into it.  My mistake was that I did not stretch enough during the process.

Patty

Polymer Clay: Brown casablanca beads

Here is a casablanca style bead and several swirl beads using different canes and scrap from the casablance bead.  These are inspired from desired creations.  I hand sanded these and buffed them with the buffer.  The complaint I have about these is that they have too much black in them.  It is possible to do this by making the black layer thinner.

Patty

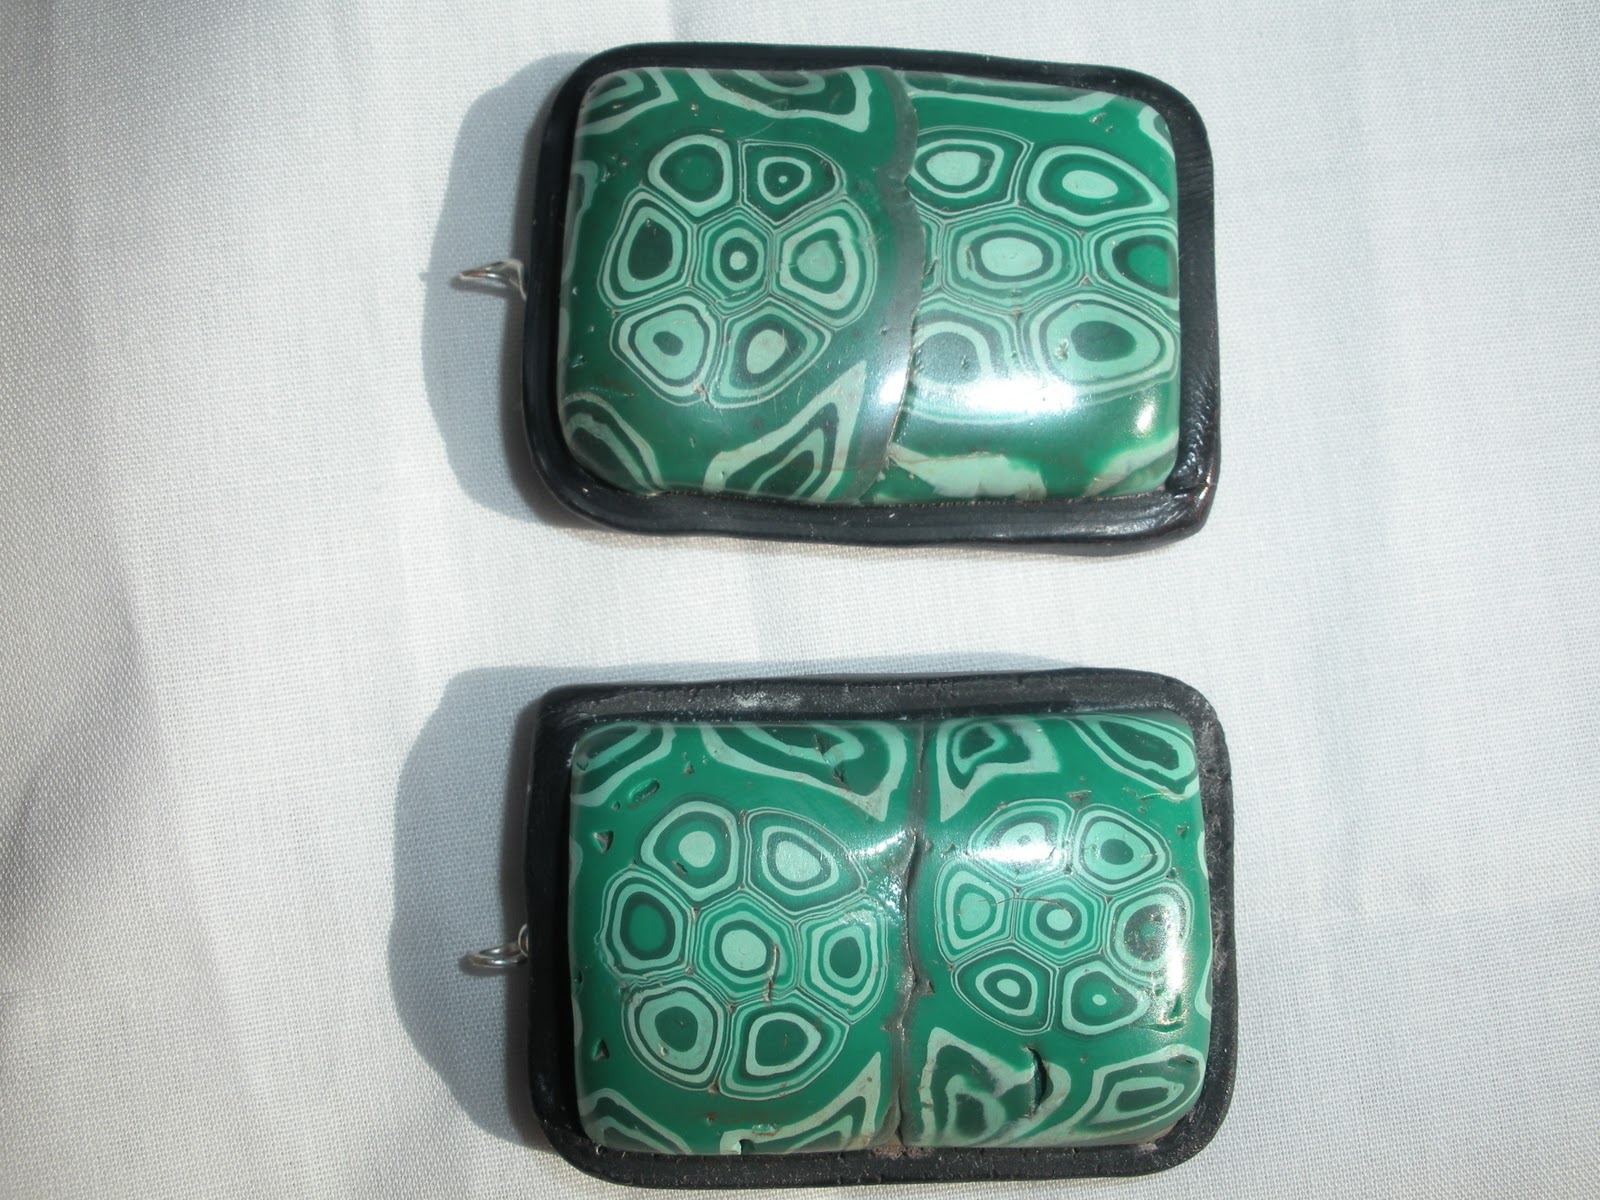
Polymer Clay: malachite faux

first cut at a malachite from Making Polymer Clay Beads by Carol Blackburn.  Mine looks more like a flower than a random stone.  But it is fairly pretty.  When I cut the rectangles I put saran wrap on top then pushed down making nice curved sides.  I put a layer of black on the back and black strips along the sides.  I am trying to get better at finishing.
I put them in the tumbler with soap water and river rocks (1/2 inch size or less) then polished them with the buffer.

Patty;)

Wednesday, April 21, 2010

Beading: Apache tears

I made this necklace for my grandmother.  The stones are Apache tears. Merconite obsidian.  My grandparents picked these up years ago rock hounding and finally they made it into jewelry.  It was a pleasure and an honor to do this for her.  These were the first to get done beause she made it a point that they were special.

Keep the faith
p

Sunday, February 7, 2010

Beading: Knot bracelets

These bracelets show off the Josephine knot and the half hitch with beads.  These designs came out of the Celtic Knots book by Susan Millodot.
To make some of the knots in the book I made a foam board to pin into while constructing the knots.  I think its a necessity to have the pin board.

keep knotting
p

Saturday, February 6, 2010

Beading: Celtic Black Dragon

This is a dragon pendant I picked up years ago.  I decided it needed a pick me up from being on a basic chain.  So I grabbed my Celtic Knots for beaded jewellery by Susan Millodot and came up with a necklace.  It is very difficult to see with the black satin cord.

Keep knotting
p

Beading: Green knots

This is a necklace with knot beads.  The large knots are seperate beads, done in two colors.  The knot on the end with the loop closure is made on the main string.  There are two slip knots at the ends of the strung beads.  This necklace was made based on a book I have about Chinese knotting called Decorative Knot Craft by Kim Sang Lan.

keep knotting
p

Friday, January 15, 2010

Beading: Progress gray stone


This is the progress I made on the stone.  But the experiment is not working out.  It slips off.  I am going to try a wire backing to stabilize it.  I don't think row after row of beads is going to help capture the stone.  The beads against the stone are very slippery.  I picked out the beads on the internet by picture alone.  The pictures seem true color enough that I got what I wanted.  The beads look good next to the stone.

Keep trying
p

Saturday, January 9, 2010

Beading: Beaded gray stone


This is the start of the first stone to be surrounded with beads to make a cabachon.  This is one of the stones from my grandfather's rock and mineral collection.  The idea comes from Beadwork magazine Feb/Mar 2009, article Chained Elegance by Julie Walker.  If this one works I'll have a good idea on how to do the rest of the stones.

Keep beading
patty

Friday, January 1, 2010

Polymer Clay: Acrylic Ink sheet

Using acrylic inks I made a multi colored sheet with a sponge.  I circle cut using different sizes so I could get a center circle to bead.  The layers are very easy to see.  Maybe I should paint the sides black.
I used yellow, orange and chestnut colored ink.

patty

Polymer Clay: Inked Sheet pendant


Using the same inked sheet I made this pendant.  It was sanded and buffed.

Keep experimenting
patty

Polymer Clay: Ripped open


This pendant starts with a silver textured layer, then a decorated sheet.  The center is punched out so that bead strings can go through as a lariat type of necklace.  I saw this type of necklace on another blog.  She did a much better job at ripping out the center.  The silver textured sheet was acrylic black painted and wiped.  This could use some steampunking!

Don't forget how to play
patty

Polymer Clay: Ripped Layers


I saw a pendant on the internet somewhere with ripped layers.  So I took some sheets and tried it. First layer is inked, second layer is gold wood grain, third layer is rainbow striped, and fourth layer is the gold wood grain again.  I made a clay tube for the back.  I did not do a great job putting it together but it came out ok.

Keep experimenting
patty

Polymer Clay: Inked Translucent Pendant


This pendant is three layers of clay.  First layer is a gold and ecru striped sheet wood grain technique.  Second layer is black and third layer is ecru base with translucent alcohol inked on top.  The inked layer is thinned in the pasta machine to help thin the translucent.  There is a jump ring clayed to the back.  The inked layer is based on techniques from The Polymer Clay Art book.

Have fun
patty

Tuesday, December 29, 2009

Polymer Clay: chaos blue


I was trying to make a surface made of strips of sheets I have previously made.  It came out terrible so I scrapped it.  In the mean time I made scrap clay and I made a block and ripple cut it.  I came out with a nice blend and made the slices into pendants.  So for a complete accident this is the result. 

Make mistakes they can be cool
patty

Sunday, December 27, 2009

Polymer Clay: Heart two


Well I experimented today to fix the one with too much sanding/polishing and it came out terrible so I trashed it.  This red one came out really well.  I froze the cane and was able to slice thinner and get an overall translucency effect.  The hearts are large pieces, so I will have to find large beads to go with them.  I wish I could finish a necklace right away but just don't have the supplies.  Love this project, and I have a ton of cane left to play with.

Keep experimenting
patty

Saturday, December 26, 2009

Polymer Clay: Hearts


I received a large stash of books this Christmas.  And one of them was Polymer Clay Art.  I saw this project and had to try it right away.  This is a cane method of covering a base bead.  The cane uses translucent clay so the base shows through.  My results were not as good as the book because I am not good at thin slicing.  But I am still pleased with how mine came out.
I had a few problems: 1. browning of the clay, did I bake it too long? Temp was ok.  2. Sanded the layer right off and the base color popped out.  Watch what your doing while sanding.  3. There is jeweler's rouge on the buffing wheel and it discolored the clay.  I scraped it off and repolished by hand.  The buffing wheel I have is old, from my grandfather, so the wheel is old and used.  Buy a new wheel.
Also Christi Friesen has a new steampunk book out, I must have it.

Keep experimenting

patty

Saturday, December 19, 2009

Polymer Clay: Flintstones


I got the idea for these "stones" from my step mother who found some colored stone beads in various shapes and I wanted them but she bought them all.  I got the granite polymer clay by sculpey and made these beads.  You must be careful when mixing the clay that you don't handle it too much or the flecks disappear. As you an see in the green one on the right bottom corner.

Play with clay
patty

Polymer Clay: Shields


The design for these shields came from Polymer Pizzazz by Bead and Button Magazine.  A multi step process which was not too hard.  I guess the hardest thing for me was that I didn't get them to all the same.  I have many irregularitites.  They have some kind of gloss coat finish which I did not put on.  I think they look good with the gloss coat so I am thinking of putting it on.

Play with clay
patty